User Manual >> Documentation >> Cases App >> Configuration Features

Configuration Features

Collaboration

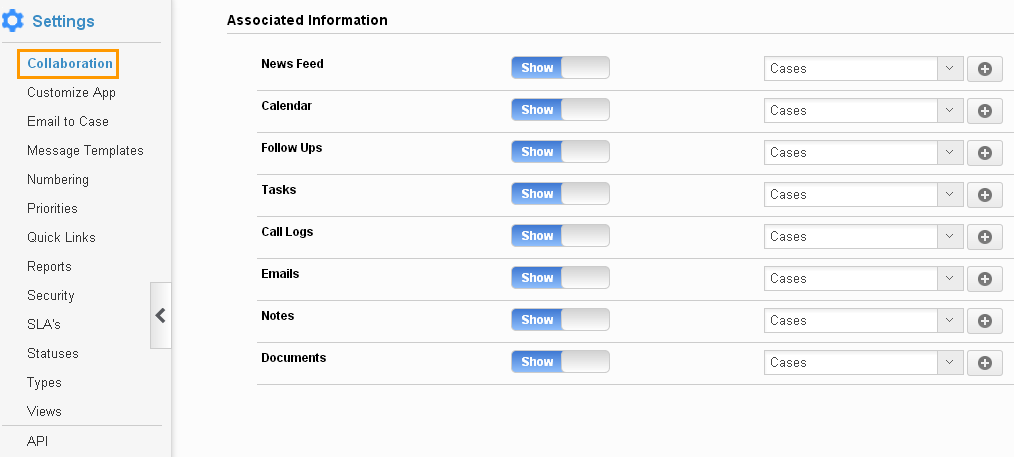
Collaboration allows you to customize associated information with activities like News feed, Calendar, Follow up, Tasks, Call logs, Emails, Documents and Notes. Click on “Show/Hide” button to enable/disable information.

Customize App

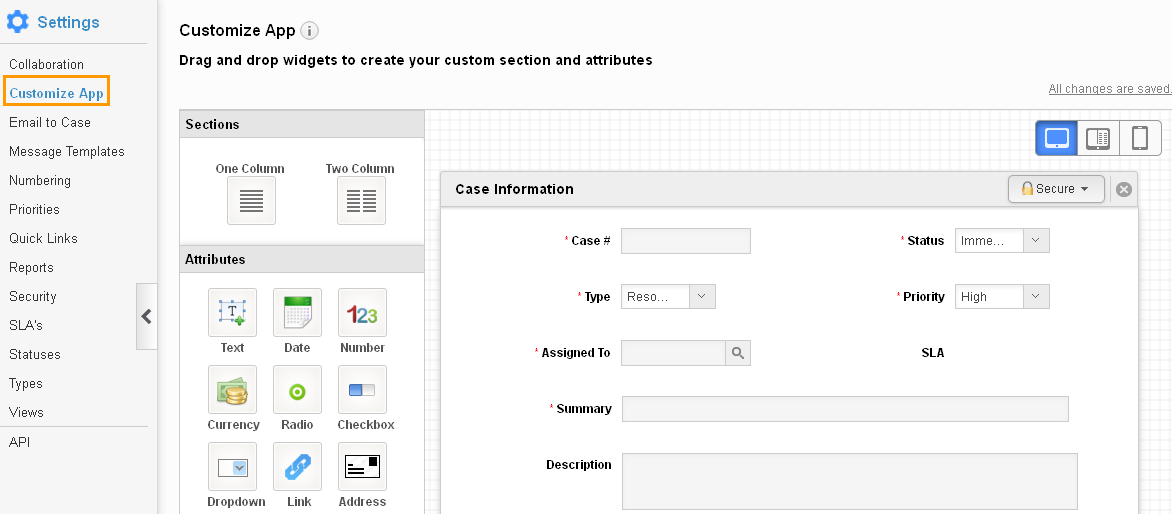
Customize App provides fields that are unique to your business. Custom attributes allow you to add any custom fields not provided in the creation page. Custom attributes include Sections and Attributes.

Email to Case

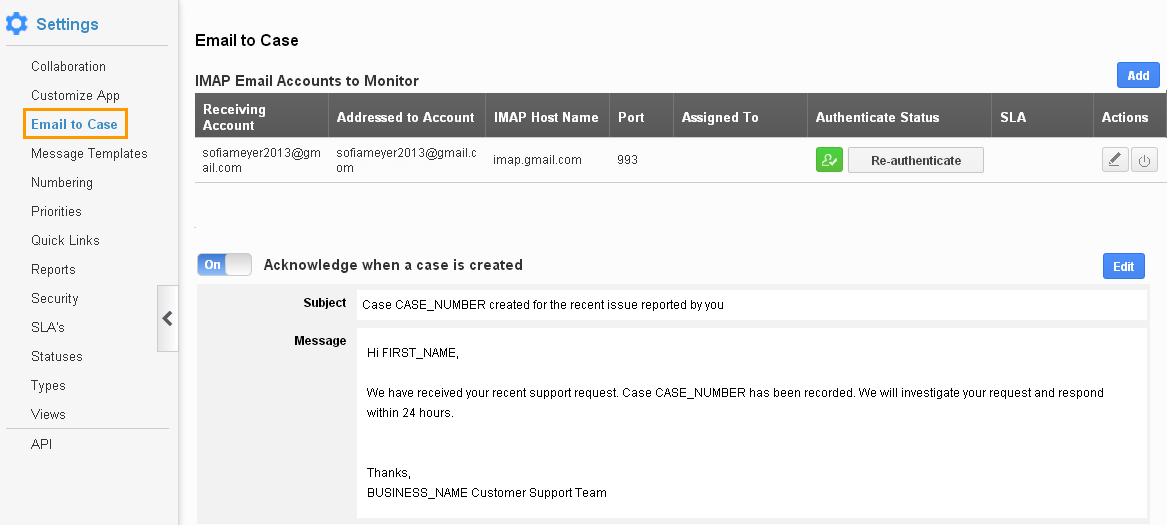
Email to case helps to capture Customer emails as cases. Provide IMAP email accounts to monitor by clicking “Add” button. Turn On/Off to acknowledge when a case is created. Click on “Edit” button to update acknowledge subject and message, if needed.

Message Templates

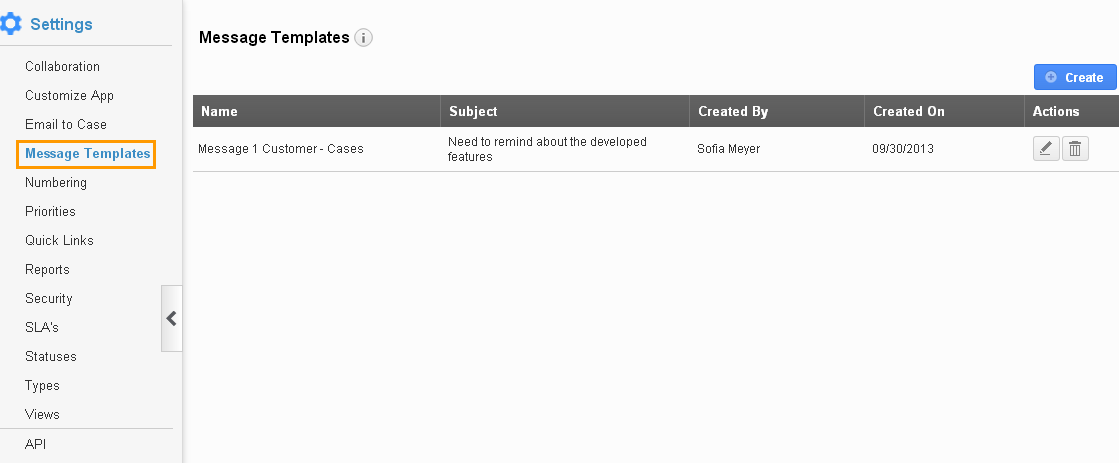
Message Templates allow you to set up predefined messages. These are customized email messages that you can send to your customers Message templates can be used with any email sent from Cases App, they are also used for auto-reminders.

Numbering

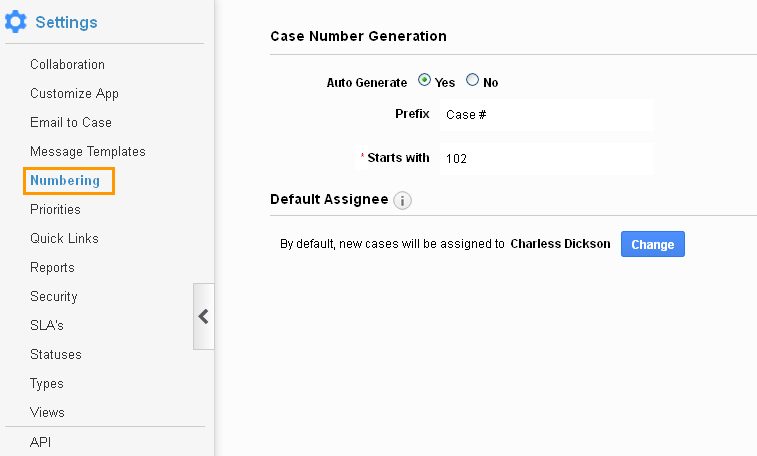
Case Number Generation:

You can either enter a case number manually or automatically generate. You have to provide a starting number and prefix for automatic generation.

Default Assignee:

Select Primary Employee/team for whom new cases should be assigned by default. Click on “Change” button and select an employee from the list.

Priorities

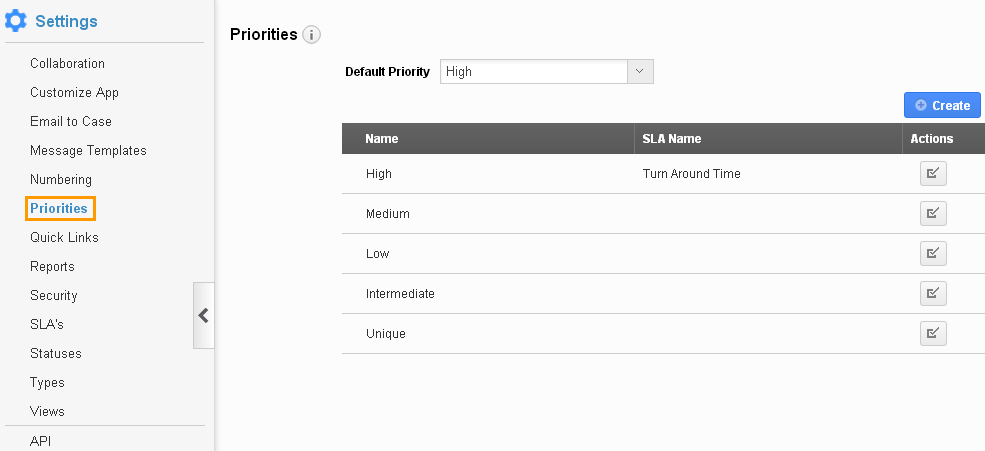
Priorities indicate how quickly the case needs to be resolved. You can create priorities by clicking “Create” button on priorities settings page.

Quick Links

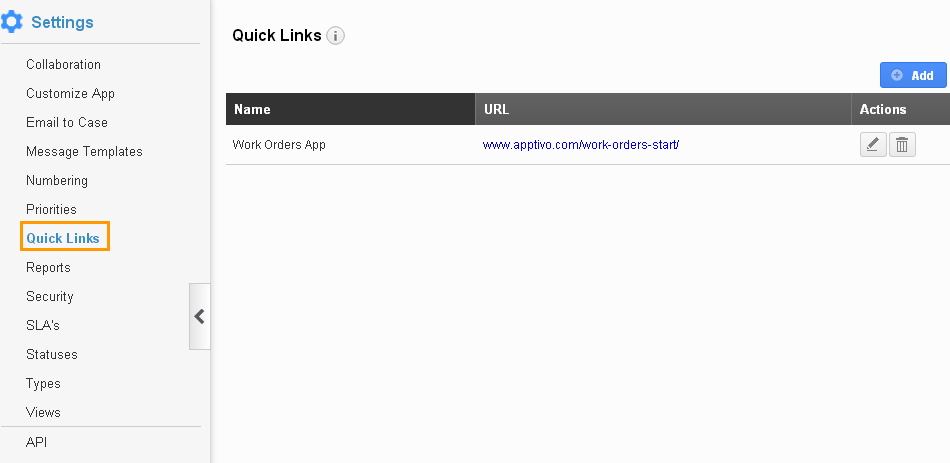
You can add your own reference links for this app. These links will display on the left panel under the “Quick Links” menu. Click on “Create” button to add new quick links.

Reports

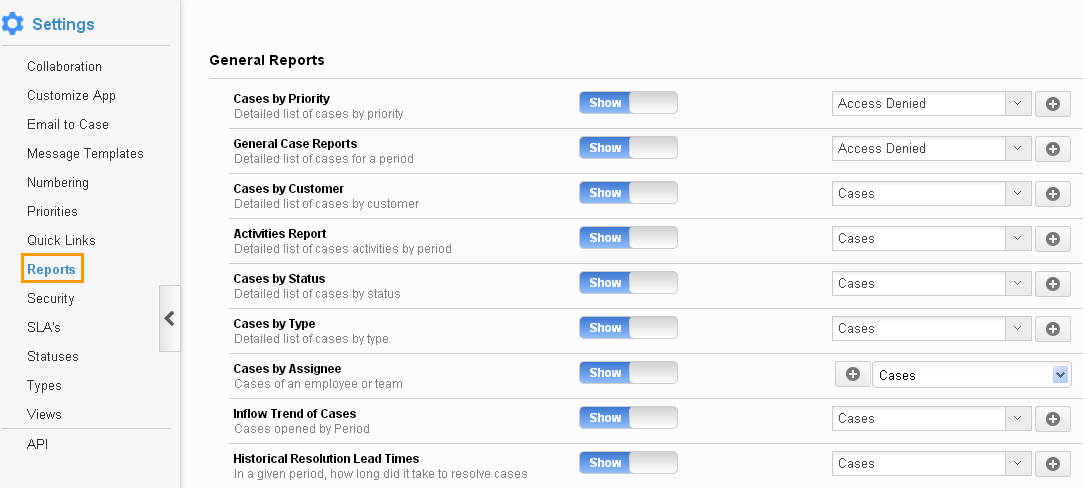
This allows you to customize reports to be shown in the dashboard, It includes:

General Report

Click on “Show/Hide” button to enable/disable reports.

Security

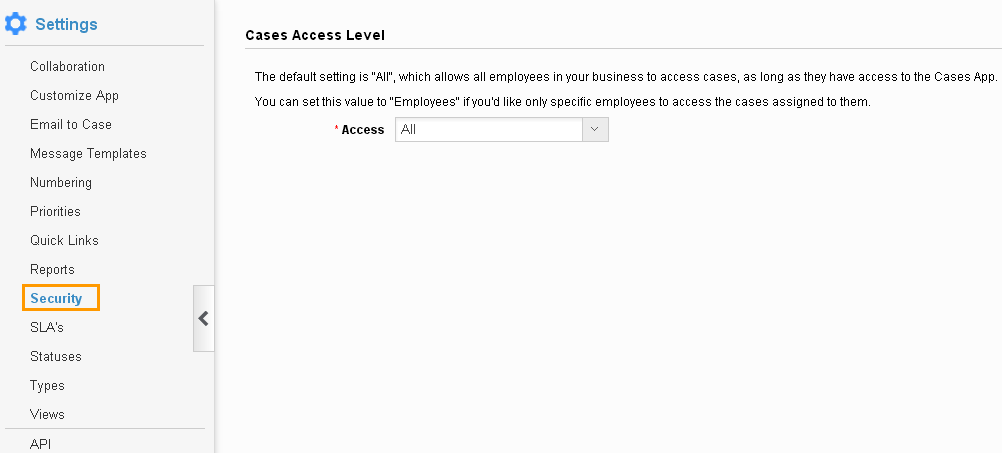
Cases Access Level allows you to provide access to Cases App. There are 2 options: Everyone with access to the cases app – Any user with access to Cases App can view all cases. Specific employees – Only employees who are assigned to work on a case can access it.

SLA’s

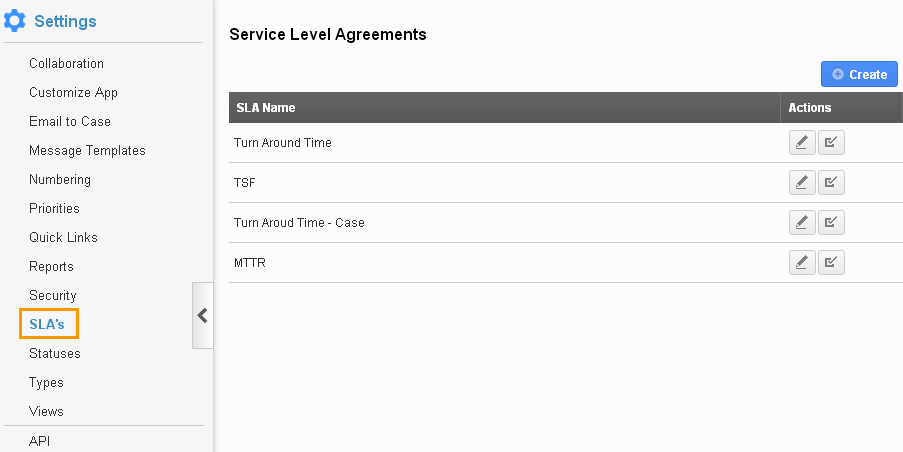
Service level agreements allow you to add SLA’s for your cases. Click on “Create” button to add new SLA’s in the dashboard.

Statuses

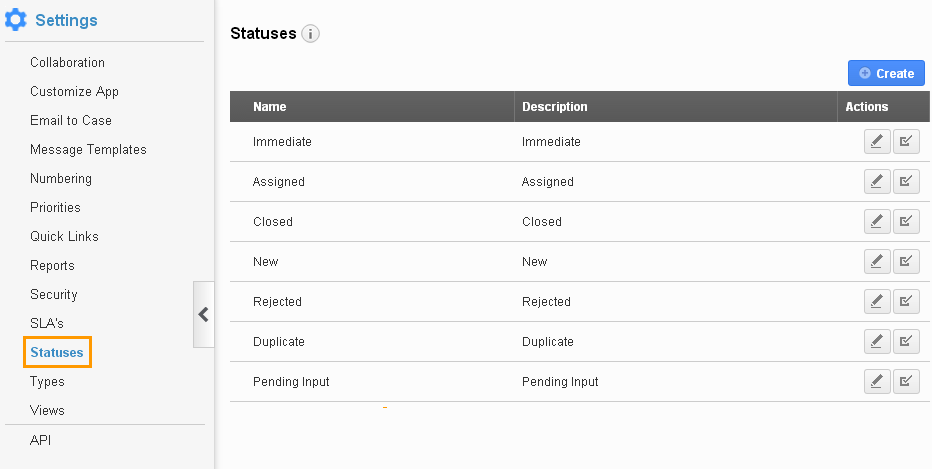
Statuses allow you to identify different status of cases. You can create status by clicking “Create” button on case statuses settings page

Types

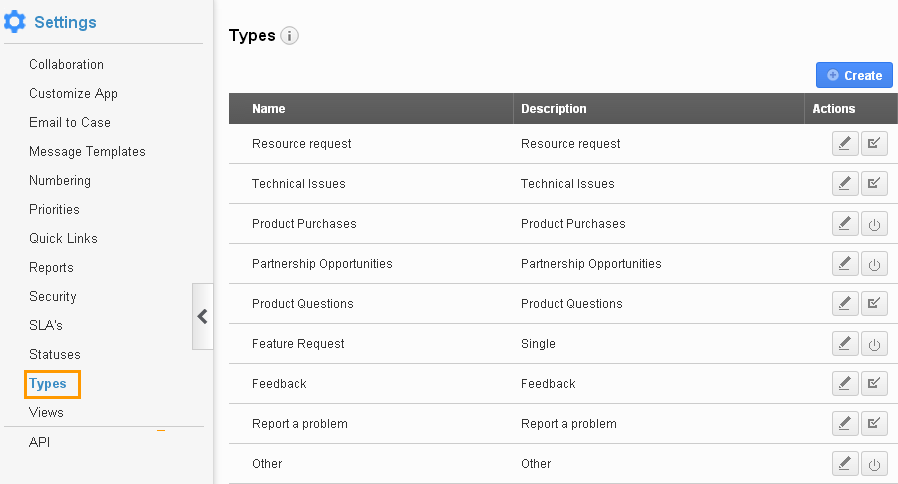
Types help you to categorize and segment cases. You can create types by clicking “create” button on types’ settings page.

Views

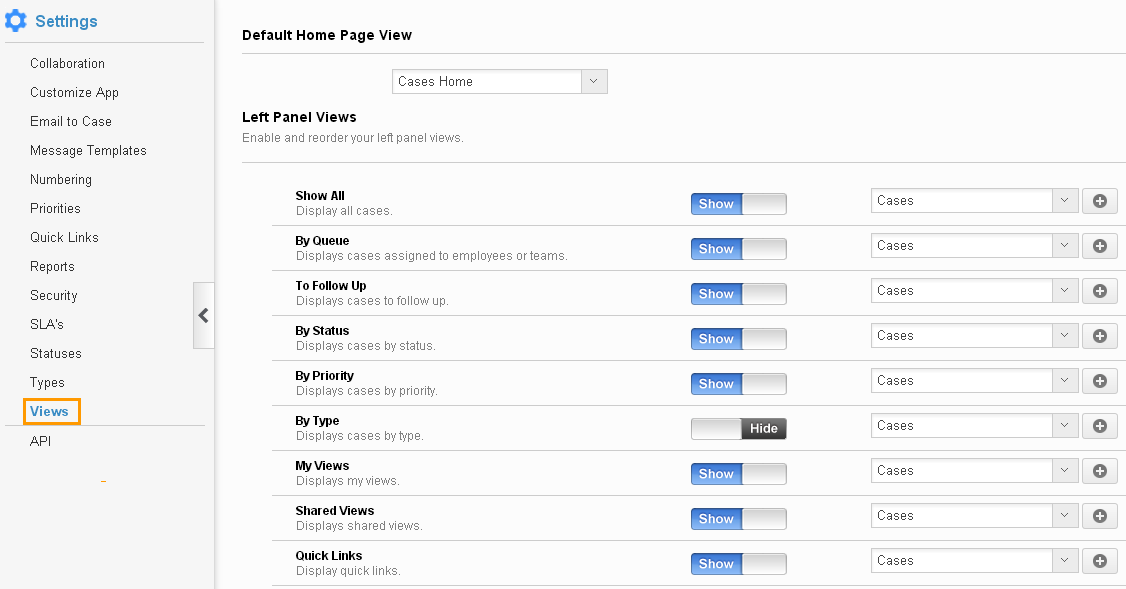
Default Home Page View

It allows you to set default home page view, which includes:

  • Cases Home
  • Show All
  • By Queue
  • To Follow Up
  • By Status
  • By Type
  • By Priority

Left Panel Views:

Views found on left navigation panel, are filters that allow you to access cases within the app. You can show/hide views in configuration, but you must at least enable one view. Click on “Update” button to apply settings.

API

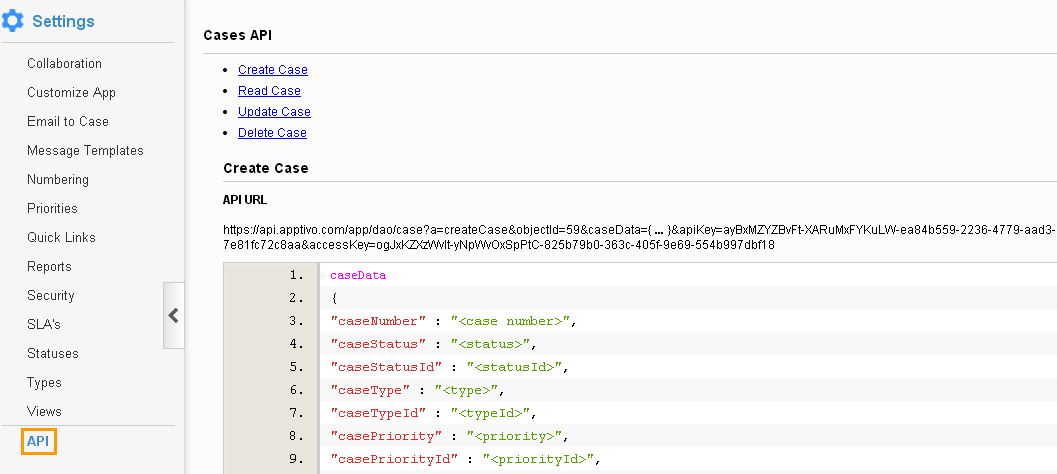
Cases API provides following four API configurations:

  • Create Case
  • Read Case
  • Update Case
  • Delete Case

  • Configuration Features

    User Manual >> Documentation >> Cases App >> Configuration Features

    Configuration Features

    Collaboration

    Collaboration allows you to customize associated information with activities like News feed, Calendar, Follow up, Tasks, Call logs, Emails, Documents and Notes. Click on “Show/Hide” button to enable/disable information.

    Customize App

    Customize App provides fields that are unique to your business. Custom attributes allow you to add any custom fields not provided in the creation page. Custom attributes include Sections and Attributes.

    Email to Case

    Email to case helps to capture Customer emails as cases. Provide IMAP email accounts to monitor by clicking “Add” button. Turn On/Off to acknowledge when a case is created. Click on “Edit” button to update acknowledge subject and message, if needed.

    Message Templates

    Message Templates allow you to set up predefined messages. These are customized email messages that you can send to your customers Message templates can be used with any email sent from Cases App, they are also used for auto-reminders.

    Numbering

    Case Number Generation:

    You can either enter a case number manually or automatically generate. You have to provide a starting number and prefix for automatic generation.

    Default Assignee:

    Select Primary Employee/team for whom new cases should be assigned by default. Click on “Change” button and select an employee from the list.

    Priorities

    Priorities indicate how quickly the case needs to be resolved. You can create priorities by clicking “Create” button on priorities settings page.

    Quick Links

    You can add your own reference links for this app. These links will display on the left panel under the “Quick Links” menu. Click on “Create” button to add new quick links.

    Reports

    This allows you to customize reports to be shown in the dashboard, It includes:

    General Report

    Click on “Show/Hide” button to enable/disable reports.

    Security

    Cases Access Level allows you to provide access to Cases App. There are 2 options: Everyone with access to the cases app – Any user with access to Cases App can view all cases. Specific employees – Only employees who are assigned to work on a case can access it.

    SLA’s

    Service level agreements allow you to add SLA’s for your cases. Click on “Create” button to add new SLA’s in the dashboard.

    Statuses

    Statuses allow you to identify different status of cases. You can create status by clicking “Create” button on case statuses settings page

    Types

    Types help you to categorize and segment cases. You can create types by clicking “create” button on types’ settings page.

    Views

    Default Home Page View

    It allows you to set default home page view, which includes:

    • Cases Home
    • Show All
    • By Queue
    • To Follow Up
    • By Status
    • By Type
    • By Priority

    Left Panel Views:

    Views found on left navigation panel, are filters that allow you to access cases within the app. You can show/hide views in configuration, but you must at least enable one view. Click on “Update” button to apply settings.

    API

    Cases API provides following four API configurations:

    • Create Case
    • Read Case
    • Update Case
    • Delete Case